Setting Up Your AcuGraph
5 Most Important Things you need to know to get started using your AcuGraph.
-
How to Setup AcuGraph Hardware:
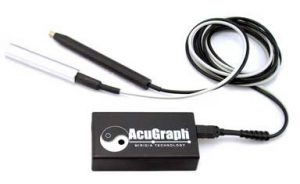
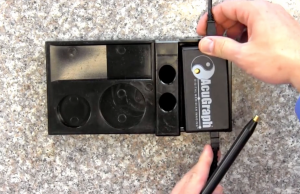
This is the AcuGraph Processing Unit – it’s the brain, heart, and soul of AcuGraph. This is what takes the measurements and sends them to the AcuGraph software.
To set this up, you’ll notice that there’s a plug on either end.
One plug is for the usb cable that goes to the computer, the other plug is for your probe and ground bar.
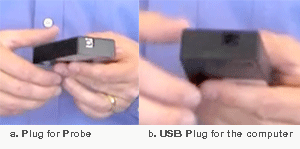
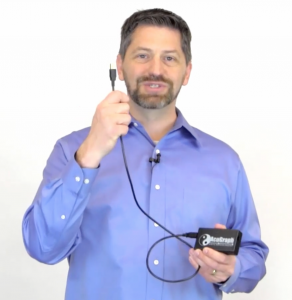
To set up your wires, the side of the unit that has the white plug connector is for the USB cable. The square USB plug is inserted here and the other end (flat) of the USB cable goes to your computer.
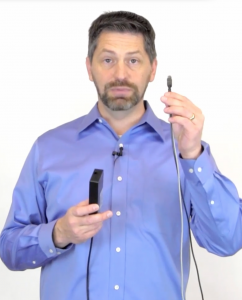
The black plug on the other side of the AcuGraph unit is for your probe cables. This is the black and grey twin cable, both coming out of the same black square plug.
Once both of these cables are plugged into the hardware unit, you can set it in a convenient place for use.
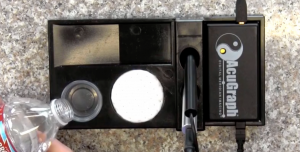
Now some of you may have received this unit, the graphing station with your AcuGraph purchase.
The graphing station is designed to hold all of your AuGraph equipment in one spot for your convenience while you’re using it.
Let’s set that up…
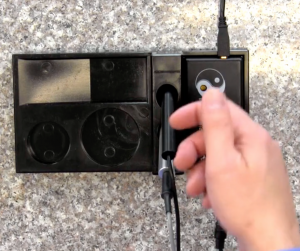
First you see that there’s a rectangular cutout where the Acugraph fits snuggly and securely so it won’t fall off at the table or the desk. You want that in there so that the probe plug (the black and grey wires) are coming off the table toward you where you’re going to use them.
Insert the black probe and silver ground bar into the two holes in the taller part of the graphing station for convenience to hold these at an angle toward you.
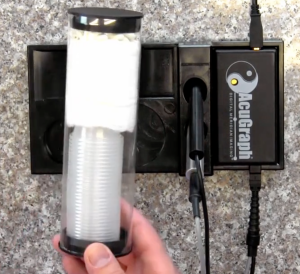
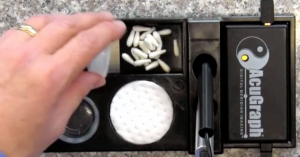
This tube includes supplies that will be conveniently used with your graphing station.
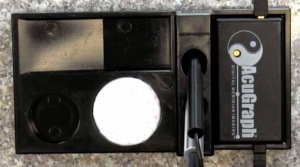
In that tube, you’ll find there are some white blotter pads for getting the excess moisture off the probe.
And there are plastic cups designed to hold the water that you will use to moisten the probe tip.
In the larger, slanted floor area, you can store the extra probe tips. These are standard cotton swab ends that have been cut to length for the probe. To replenish your supply you can buy these at any drug store and cut your own tips, or you can purchase more pre-cut from our website.
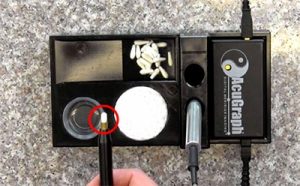
And once your graphing station is setup, or you have made other setup arrangements for AcuGraph, take a cotton swab end and insert it on your probe, as you see in the red circle, below.
Once inserted, moisten the cotton tip with water and dab off any excess water on the blotter pad or a nearby towel. You want the probe tip to be wet, but not dripping. Your equipment is now ready to take measurements.
2. Performing the AcuGraph Exams
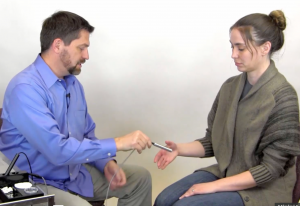
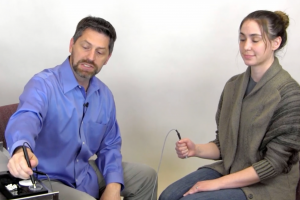
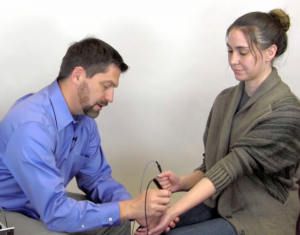
Have the patient hold the silver ground bar in one hand. Which hand they use does not matter, and the patient needs to maintain contact with the ground bar, but does not need to squeeze it.
Take your probe and make sure you have a clean cotton tip inserted in the gold sleeve. Moisten the cotton tip in the water for 2-3 seconds and tap it on the moisture pad few times to remove the excess water. (When you take a measurement you want it to leave a small wet spot but you don’t want a droplet of water dripped or running across the skin.)
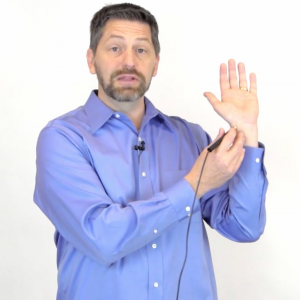
With the probe tip moistened, follow the prompts on the screen. Take note to place the probe perpendicular to the skin rather than at an angle. Do not apply extra pressure with the probe, the weight of the probe is sufficient to capture a reading and is easily standardized across measurements.
At the end of the reading, you’ll hear that it gives you a double beep audio tone to let you know that your reading was captured and the software announces the next point for you to measure. Move to that next point and repeat the process.
Tip: If you notice that the reading is kind of low at a certain point, you can move the cotton tip across the skin, looking for a higher reading because you might not be on the right point. The electrical location of the points may by slightly different than the traditional anatomical location, and when you find the correct location, you will notice based on the elevated reading. Just follow the software point-by-point and you should have great results.
One other thing to keep in mind, as you get started it’s going to require some practice and so your first five or ten graphs you should ask somebody to help you out. Friends, family members or employees work great for this, and will allow you to practice a little bit. Pay special attention to finding the points, moving around slightly to get the highest readings, and moving from point to point throughout the exam. It is common to ask the patient to switch hands with the ground bar when you are ready to start measuring the other hand, and they can choose whichever hand is most comfortable while measurements are performed on their feet.
Once you have completed five or ten graphs, you should be ready to complete good quality exams.
3. Remeasuring to track results in AcuGraph
Now that you’ve completed your first graph with AcuGraph, let’s talk about one of the primary source of confusion new users run into so we can help you avoid it.
People who are very excited with their new equipment often share that after they’ve taken their probe and they’ve done their first graph, and then they immediately do another graph on the same person just to see if it gives the same result twice. Well it doesn’t.
Here’s the thing…
When you take a measurement, you’re actually putting a small electric current right into that acupuncture point and that small electric current travels through the meridian. That’s actually how we’re able to get a measurement of how well the meridian is conducting electricity. But the act of taking the measurement makes two important changes physiologically:
1. There’s a change right at the point where you measure. It creates a charge from the electric current in the skin. This is called an ‘ionic gradient’ and that ionic gradient can persist for minutes or even hours. So it changes the point that’s measured therefore, when you go remeasure you’ll find out that the point has changed because you measured it.
2. When you measure you are putting a small electrical current through the meridians. When you put that through the meridians it changes the meridian itself. Therefore, it really takes a complete horary cycle, a full 24 hours, for the channels to re-balance and settle back down again. If you measure and remeasure right away, you’ll find that the results are different. You changed the system by measuring it. This is expected.
So, how does re-measurement work correctly?
When you measure today and treat the patient based on the results of that measurement, give the patient time for the treatment to take effect. At their next visit, say in two days, measure again and compare the results of that measurement with the original measurement from the first visit. How did the patient respond to your treatment? Results may be good or bad, and you should use this information to adjust your treatment plans for each subsequent treatment. Some patients will respond better, faster than other patients. Repeat this re-measurement at the beginning of each visit. As you go through several visits you’ll see considerable consistent patterns that develop. And in that consistent pattern, you’ll also see how it begins to change and improve with time as you treat.
Hopefully, this resolves concerns or confusions you have about whether the measurements are consistent. They will be when you consistently measure over the course of several days and multiple visits.
4. Re-measuring “Split” Meridians in AcuGraph
Now that we’ve covered the appropriate way to complete re-measurements for an entire exam, it’s important that we talk about re-measuring specific points at the conclusion of an exam. This is called re-measuring “Split” Meridians, and is one of the most important features of AcuGraph. When you’ve completed a graph, the computer will analyze the readings you have captured and can help identify points where you may have missed the reading location. Theses show up as “Split” readings, and the software will prompt you to re-measure these points right away.
At first this may be confusing because it’s asking you to immediately remeasure something you just measured. (And, I’ve just told you not to re-measure!)
Allow me to explain it a little bit…
A split is what you find when the measurement on one side (right) compared to the measurement from the the other side (left) of the same channel is very different. Normally the two sides are going to be similar. When you have a split, there’s a major difference between the two sides. The most common cause of this is a missed point location on one side of the body. Acupuncture points will always have a higher reading than the surrounding skin. That’s how you can locate acupuncture point with your probe. If you’ve missed the point during the reading, then you’ll have a low reading on the side where you missed the point.
Therefore, you may end up with a graph that has a split for that particular meridian.
The software will prompt you to re-measure that point, but only on the low side because you might have missed the point there. So if you go back and remeasure that side and you get a higher reading, sure enough you missed the point the first time and now you’ve gotten the correct reading. This new reading is the one that it uses. If you go back and remeasure that side and you don’t have the reading come up to match the other side, that is a true “Split” and that needs to be treated. The software will help you identify that.
So, in summary, it’s okay to go back and re-measure splits because you’re only re-measuring the low reading to see if point location was off. This is why the re-measure “Split” feature is so important. It makes your readings more accurate, provides more accurate treatment recommendations and gives you a better outcome all the way around.
You’re all set – it’s time to start practicing…
Welcome to AcuGraph!
